|
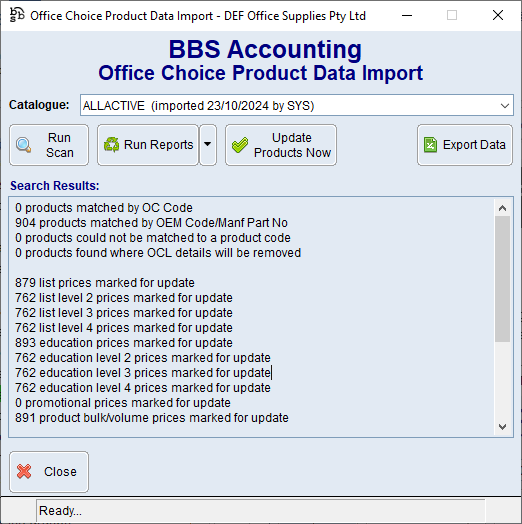
Main Menu > Inventory Control > Office Choice Product Data Interface > Office Choice Product Data Import |

There are three stages to the Office Choice Data Import process.
Stage 1: Running the Scan
Users should select the ALLACTIVE catalogue from the list, and press Run Scan to start the comparison process between the Office Choice Product Data and their BBS product masterfiles. Once the scan is complete, a summary of the results is displayed to users.
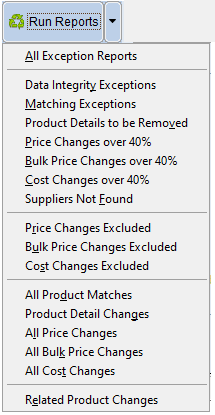
Stage 2: Reviewing the Exception Reports and making changes to the Product Data
Users can then select to run any reports they wish to review prior to updating the data.
If a report fails to find any data to display, the report will not be produced.
WARNING: While some of the reports that can be produced may not need to be reviewed every time an update is performed, it is highly recommended that all the Exception Reports are looked at. Failure to do this may result in undesirable data being updated to your BBS product masterfiles.
NOTE: If any changes are made to the BBS product masterfiles during the course of reviewing these reports, the Run Scan button must be executed again before the reports can be re-run.
|
|
Below is an explanation for each report that can be produced, and how best to use the reports to find problems with the product data update.


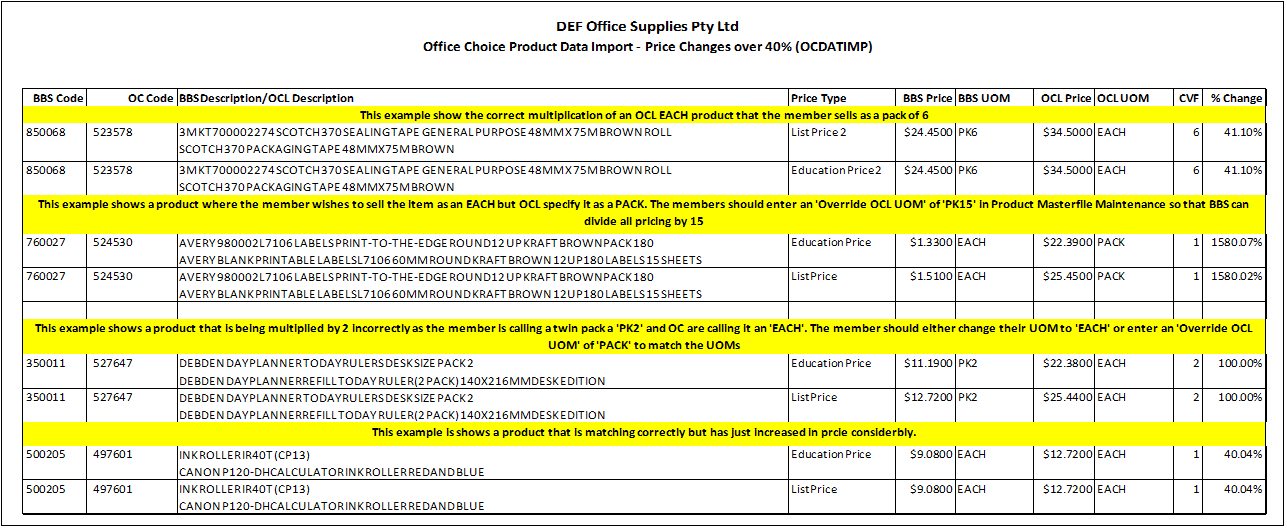
 Price Changes over 40% and Bulk Price Changes over 40% and Cost Changes over 40%
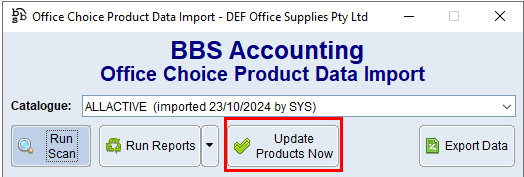
After the relevant reports have been reviewed and users are happy to proceed with the Update, click the Update Products Now button.
Users will then be asked to confirm they wish to update the selected Office Choice Product Data to the BBS Accounting product masterfiles. Users should click Yes to continue.

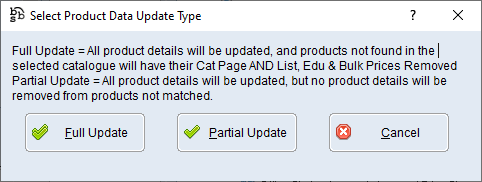
After confirming to proceed with the update, the below pop up will appear, users should select Full Update.
Once the update is completed users will receive the below notification.